Affiliate disclosure: MyGreenShed is reader-supported. We may earn a small commission when you buy through links on this page. We only recommend products we have used or thoroughly researched.
A blunt chain is the most common reason a chainsaw stops cutting well, and it is also the easiest problem to fix yourself. Once you know the routine, touching up a chain with a file takes about ten minutes, costs very little and gives you a saw that pulls itself into the wood again. Put it off and you will end up pushing the saw, burning the bar and chain, and wearing out the engine or battery faster than you should.
This guide walks through the whole job for UK gardeners: how to tell when a chain needs attention, which tools and file sizes to use, a clear step-by-step method, the depth gauge adjustment most people forget, and the mistakes that ruin chains. We have also picked five sharpening tools at different price points, from a basic file kit to a bench grinder, so you can choose what suits your saw and how often you use it.
Quick Summary
- Sharpen little and often: a few strokes per tooth every time you refuel or recharge keeps the chain cutting well and saves you from major regrinds.
- Match the round file diameter to your chain pitch, which is stamped on the guide bar near the mounting end. Using the wrong size is the number one beginner error.
- Keep every tooth the same length. File each cutter the same number of strokes and always work from the shortest tooth.
- Lower the depth gauges (rakers) every few sharpenings, otherwise a freshly sharpened chain will barely cut.
- If the chain is hit by a stone, badly damaged or filed down to the wear marks, replace it rather than sharpening it again.
Signs Your Chainsaw Chain Is Blunt
You do not need to inspect every tooth under a magnifying glass to know a chain has had its day. These are the clues that most gardeners notice first:
- Dust instead of chips. A sharp chain throws out long, chunky wood shavings. A blunt one produces fine sawdust, especially in dry wood.
- The saw does not pull itself into the cut. You find yourself leaning on the saw to make it bite, instead of letting its weight and the bar spikes do the work.
- The saw cuts crooked. If the cut drifts to one side, the teeth on that side are usually duller or shorter than the other.
- Smoke or burn marks on the wood, or a bar that is running hot and blueing. Friction from a blunt chain generates a lot of heat.
- More vibration and noise than normal, and a petrol saw working hard in the cut or a cordless saw draining its battery noticeably faster.
If you hit soil, a stone or a nail, stop and check the chain straight away. Even brief contact can dull the cutting edge across several teeth in an instant.
Before You Start: Safety and Setup
Sharpening is a low-risk job compared with cutting, but the chain is still full of sharp edges and the saw needs to be properly secured. Before you touch the chain:
- Switch the saw off. For a petrol saw, take the spark plug cap off. For a cordless saw, remove the battery. For a corded saw, unplug it.
- Wear sturdy gloves. The cutters are sharper than they look and a slip with the file can easily cut your hand.
- Engage the chain brake before you start, then release it only when you need to pull the chain round to the next tooth.
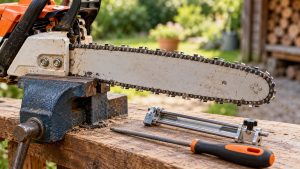
- Hold the bar firmly. A vice with the bar clamped between soft jaws is ideal, or you can wedge the bar into a cut in a log or stump so it cannot move.
- Work in good light. Failing eyesight and a dim shed are a bad combination for judging file angles.
If you are new to chainsaws, it is worth reading our guide on how to use a chainsaw safely before you start cutting with your freshly sharpened chain.
Understanding Your Chain: Pitch, Gauge and Cutter Type
Every chain is described by a handful of measurements, and these decide which file you need. You will usually find them stamped on the guide bar near where it fits to the saw, or on the packaging of a replacement chain.
- Pitch is the spacing between the rivets, divided by two. Common pitches on garden saws are 1/4 inch, 3/8 inch low profile (often written 3/8 LP), .325 inch and standard 3/8 inch.
- Gauge is the thickness of the drive links where they sit in the bar groove. It does not affect which file you use, but it matters when buying a replacement chain.
- Cutter type is either chisel (square corners, cuts fast but dulls sooner in dirty wood) or semi-chisel (rounded corners, more forgiving and the usual choice on domestic saws).
As a general guide, 3/8 inch low profile and 1/4 inch chains usually take a 4.0 mm (5/32 inch) round file, .325 inch chains usually take a 4.8 mm (3/16 inch) file, and standard 3/8 inch chains usually take a 5.2 or 5.5 mm (7/32 inch) file. Always check your saw manual or the chain packaging to confirm, because different manufacturers do not always follow the same pattern.
What You Need to Sharpen a Chain by Hand
- A round file of the correct diameter, ideally in a file guide that holds it at the right height and angle.
- A flat file and a depth gauge tool (also called a raker gauge) for setting the depth gauges.
- A vice or a firm way to hold the bar.
- A marker pen to mark your starting tooth, so you know when you have been all the way round.
- Gloves and, if you can, a small brush and some chain oil to finish.
Most kits bundle all of these together, which is why we have reviewed the best options below. If you want to go deeper on the full range of tools, including electric options, take a look at our round-up of the best chainsaw sharpeners.
How to Sharpen a Chainsaw Chain: Step by Step
1. Clean the chain and bar
Wipe off sawdust, sap and oil with a rag and a stiff brush. A clean chain lets you see the cutting edge and stops you pushing grit across the file. Check the chain for cracked or bent links while you are there. If you find any, replace the chain rather than sharpening it.
2. Secure the saw and set the tension
Clamp the bar in a vice or wedge it firmly. The chain should be snug against the bar but still free to be pulled round by hand. A loose chain moves under the file and gives you uneven results.
3. Find the shortest tooth and mark it
Look along the chain for the cutter that has been worn down the most or damaged. This is your reference. Every other tooth will be filed back until it matches this one, so pick it carefully and mark it with the marker pen. If one tooth is badly chipped, the others will have to come back to its length, which is why a damaged chain can lose a lot of metal in one session.
4. Position the file in the cutter
Each cutter has a curved top plate with a round gullet in front of it. Rest the round file in that gullet so that it sits against the cutting edge. About one tenth of the file diameter should stand above the top of the cutter. A file guide makes this much easier, because it holds the file at the right height and shows you the angle line to follow.
5. Set the correct angle
Most domestic chains are sharpened with a top plate angle of about 30 degrees, and the file should be held level, at right angles to the bar. Many file guides have angle marks, so line them up parallel to the bar. Always check your chain manufacturer’s recommendation, because some chain types call for a slightly different angle.
6. File each tooth the same way
Push the file forward and slightly outwards with smooth, firm strokes, filing from the inside of the cutter outwards. Lift the file on the return stroke, since a file only cuts on the push. Three to five strokes per tooth is usually enough for a regular touch-up. Count the strokes on the first tooth and use the same number for every other tooth on that side, so the cutters stay the same length.
7. Work along one side, then the other
File all the teeth that face one direction, pulling the chain round as you go with the brake released. Then turn the saw around in the vice, or move to the other side of the bar, and sharpen the opposite set of teeth at the same angle. The left and right cutters alternate along the chain, so you will end up doing every other tooth on each pass.
8. Check and lower the depth gauges
Each cutter has a small raised tab in front of it called a depth gauge, or raker. It controls how deeply the tooth can bite. Each time you sharpen the cutter, you also file it back slightly, which brings it closer to the height of the depth gauge. After a few sharpenings the gauge stands too proud and the chain cuts slowly, even though the teeth look sharp.
Lay the depth gauge tool over the chain so that the gauge pokes through its slot. If the gauge stands above the tool, file it flat with the flat file until it is level with the tool, then round off the front corner to keep the original shape. Your chain or saw manual will give the correct setting. Many garden saws use a setting of around 0.025 inch (0.65 mm), but do not guess, because setting it too low makes the saw grab and kick.
9. Finish, oil and test
Wipe the chain down, refit any covers and top up the bar oil. Then make a test cut in a spare log. You should see long, curly chips and feel the saw pulling itself into the wood. If it still produces dust, or the cut wanders, one side is duller than the other, so check each side again.
How Often Should You Sharpen?
As a rule of thumb, give the chain a quick touch-up every time you refuel a petrol saw or recharge a battery. If you are cutting clean softwood, you may only need a couple of strokes per tooth. For dirty or dry hardwood, such as old fence posts or logs that have been lying on the ground, expect to sharpen more often. Most chains can be sharpened somewhere between five and ten times with a hand file before the cutters wear down to the manufacturer’s wear mark, and then it is time for a new chain. Keeping a spare chain on hand is handy for days when you hit a stone and do not want to stop work.
Common Chain Sharpening Mistakes to Avoid
- Using the wrong file size. A file that is too small leaves a sharp ridge in the gullet. One that is too big flattens the cutter’s hook and stops it biting.
- Different angles on each side. This is the main cause of a saw that cuts crooked. Use a file guide and check every tooth.
- Filing the teeth to different lengths. The longest tooth does all the work and the chain cuts roughly and unevenly.
- Forgetting the depth gauges. A sharp chain with high gauges cuts slowly, and gardeners often assume they have done the sharpening wrong.
- Over-sharpening. Removing too much metal in one session shortens chain life. Little and often wins.
- Sharpening a damaged chain. A chain with cracked links, missing teeth or excessive wear should be replaced.
The Best Chainsaw Sharpening Tools for UK Gardeners
We checked every tool below on Amazon UK to confirm that it is in stock, and the prices quoted are rough guides only. Whichever you choose, check the file or stone size against your chain pitch before ordering. The Stihl guide and the Oregon kits are commonly used with a wide range of garden saws, but always compare the size with your own chain.
Quick Comparison
| Tool | Type | Around | Best for |
| Budget 10-piece file kit | Hand file kit | £8-12 | First-time sharpeners on a tight budget |
| Oregon Universal Field Sharpening Kit | Hand file kit | £18-22 | Regular home sharpening and carrying in the toolbox |
| Stihl 2 in 1 Easy File | File guide with file | £45-50 | Quick, accurate filing, especially with Stihl chains |
| Oregon 12V Sure Sharp | Electric sharpener | £24-30 | Fast touch-ups without filing by hand |
| Oregon Professional Compact Bench Grinder | Bench grinder | £170-200 | Heavy users and sharpening several chains |
Budget 10-Piece Chainsaw Sharpening File Kit
If you have never sharpened a chain before and just want to see what the fuss is about, a cheap multi-piece file kit is a sensible way to start. This type of set generally includes a few round files in different diameters, a flat file, a depth gauge tool, a file guide or handle and a small carry pouch, all for around the price of a pub lunch.
The advantage is that one kit covers several chain pitches, which is useful if you own more than one saw. The trade-off is quality. The files are usually softer than premium brands, so they dull sooner, and the guide is simpler. For occasional use on a garden saw, though, it does the job.
Pros: Very low price, covers several file sizes, includes a depth gauge tool and pouch, ideal for learning.
Cons: Budget files wear quickly, plastic parts feel light, and the quality varies more than with the established brands.
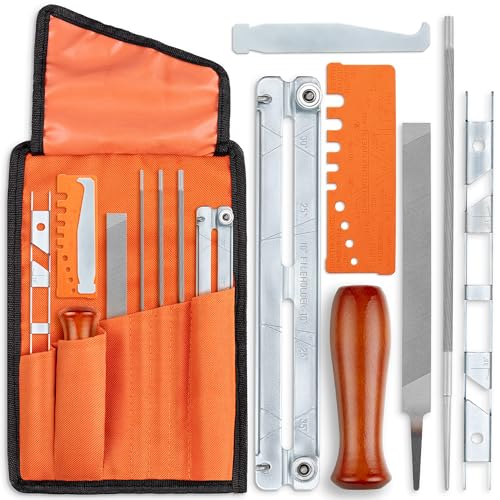
- EFFORTLESS SHARPENING - Keep your chainsaw at peak performance with the Effektwerk Chainsaw Sharpening File Kit; This 10-piece set tool is your go-to solution for maintaining razor-sharp chainsaw blades, ensuring clean and efficient cuts every time
- PROFESSIONAL-GRADE QUALITY - This file set is crafted from high-quality, long-lasting materials, ensuring it can withstand the rigors of frequent use; Invest in a kit that's built to last & will keep your chainsaw blades sharp for a long time to come
- PERFECT CHAIN ALIGNMENT - This set has everything you need, including a sharpener filing guide holder and a bar groove cleaner; Plus, the depth gauge tool is essential for accurate chain alignment for less wear and tear and to achieve an efficient cutting
- INCLUDES - 1 Flat file for precision sharpening, 1 Wood handle for a comfy grip, 3 Round files for versatile use, 1 File guide holder, 1 Bar groove cleaner, 1 Depth gauge, 1 Quick check gauge & 1 Storage pouch to keep everything organized and accessible
- CONVENIENT & PORTABLE - Whether you're a professional arborist, logger or simply maintaining your backyard, this tool set is for you; The kit comes with a storage case for easy organization and transport, making it perfect for on-the-go sharpening needs
Oregon Universal Chainsaw Field Sharpening Kit
Oregon is one of the best-known names in chain and sharpening accessories in the UK, and its universal field kit is a popular all-rounder. The kit is built around round files and a guide holder designed to be used out in the garden or woodland, so you can touch up the chain without taking the saw back to the workshop.
It is easy to follow for a beginner, the guide helps you hold a consistent angle and the files are better made than the very cheapest sets. It suits owners of mains and cordless saws who want a reliable kit they can leave in the shed.
Pros: Trusted brand, simple to use, compact enough for the toolbox, good value for regular use.
Cons: Check the included file sizes match your chain, and it does not include a bench vice or mounting system.
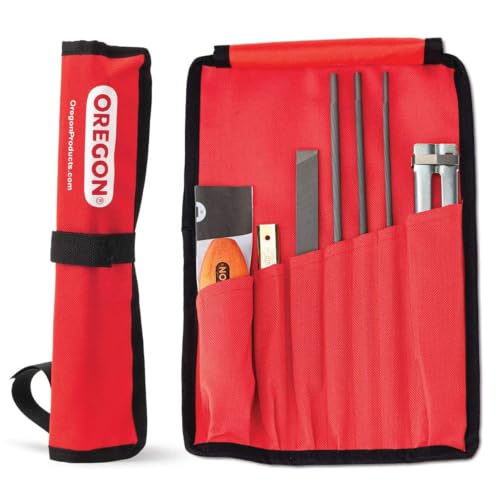
- Universal, portable chainsaw sharpening kit, designed to sharpen your saw while you’re on the job
- Comprehensive kit includes 1 x 5/32 Inch (4.0 mm) round saw chain file, 1 x 3/16 Inch (4.8 mm) round saw chain file, 1 x 7/32 Inch (5.5 mm) round saw chain file, 1 x 6 Inch flat file, 1 x file guide, 1 x universal file handle and instruction sheet
- Convenient and portable kit comes with rolled pouch with inner pockets and hook and loop closure
- Instruction sheet inserted into the handle pocket for safe-keeping and easy access
- Limited lifetime warranty

Stihl 2 in 1 Easy File Chainsaw Sharpener
The Stihl 2 in 1 Easy File combines a round file with a depth gauge file in one tool, so you sharpen the cutter and lower the depth gauge in the same pass. That cuts out a lot of the guesswork for beginners, because the built-in guide sets both the filing angle and the height for you.
Because it comes in different sizes, you need to choose the version that matches your chain. The one we checked is made for standard 3/8 inch chains. It is the priciest hand tool in this list, but if you want repeatable, tidy results, it is a very practical choice, and you do not need to own a Stihl saw to benefit from it.
Pros: Sets angle and depth together, quick and accurate, well-made, easy for beginners to get right.
Cons: Costs noticeably more than a basic kit, only suits the chain pitch it is made for, and replacement files add to the cost over time.
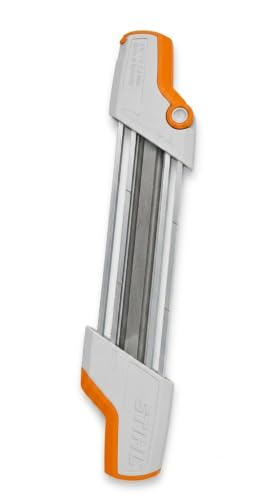
- Easy File 3/8"
- 5605 750 4305
- 2 in 1 File Holder
- Resharpens Cutter and Lowers depth gauge in a single operation
Oregon 12V Sure Sharp Electric Chainsaw Chain Sharpener
If hand filing is not for you, an electric sharpener such as the Oregon Sure Sharp is a convenient alternative. It runs from a 12V supply and uses a small abrasive stone to grind each cutter, so you can touch up a chain in a few minutes with less effort than filing.
It is best suited to light maintenance on small to medium garden saws. You still need to hold the saw steady, use the guide correctly and check the depth gauges separately, as an electric tool will not do that for you. It is also easy to remove too much metal if you get carried away, so go gently.
Pros: Fast touch-ups, less effort than hand filing, affordable for an electric option.
Cons: You still need to set the depth gauges by hand, it takes some practice to get even results, and the stones wear down with use.

- Chainsaw sharpener: Electric saw chain sharpener. 12-volt grinder comes with a car power adapter and alligator clips. Sharpens most chainsaw chains up to .404-inch pitch
- Sharpening stones inside: Contains 3/16 Inch (4.8 mm), 5/32 Inch (4.0 mm) 11/64 Inch (4.5 mm) and 7/32 Inch (5.5 mm) grinding stones
- Easy chainsaw sharpening kit: Simple sharpening angle adjustment guide for accuracy
- Lightweight: Ergonomic design. Long power cord included (5 meters)
- Powerful motor: Runs at an optimum 25,000 RPM
Oregon Professional Compact Bench Grinder
For heavy users, tree surgeons and anyone looking after several saws, a bench-mounted chain grinder gives the most consistent results. The Oregon Professional Compact model holds the chain in a clamp and lets you set the angle and grinding depth precisely, so every cutter ends up the same length.
It is a serious step up in cost, and it is overkill if you only run one small garden saw a few times a year. But if you sharpen frequently, or you are looking after a neighbour’s saws as well as your own, it can pay for itself in saved replacement chains and gives a more professional finish than a hand file.
Pros: Very consistent results, fast, ideal for multiple saws and frequent use, built for regular work.
Cons: Expensive for casual use, needs a workbench and some setting up, and has a learning curve before you get the best from it.
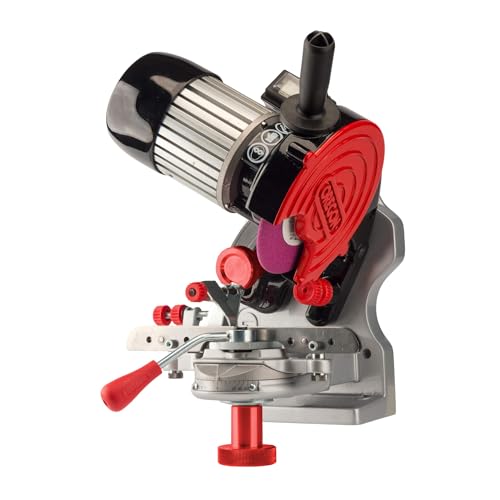
- Bench or wall mounted Professional grinder: Perfect for semi-professional and home users who regularly saw wood
- Save time and money: Sharpen your own chainsaw chains. Grinder easily mounts to a bench or wall with two included bolts - ideal for a workshop or garage
- Universal chainsaw sharpener: Electric chainsaw chain sharpener, sharpens up to .404 Inch pitch chain. Sharpen almost any saw chain from manufacturers such as Oregon, Stihl, Husqvarna, and others
- One-way motor rotation: Accurate chain saw sharpening device provides greater operator safety and comes with a manual chain clamping vice
- Includes: Grinder, a dressing brick and profile guide, operator instructions plus two grinding wheels (3.2mm and 4.7mm) and a 6.0mm flat profile disc for depth gauge maintenance
Which Should You Choose?
For most home gardeners with one or two saws, a good hand-file kit such as the Oregon field kit or the Stihl 2 in 1 Easy File is the best balance of cost, control and simplicity. If you are brand new to the job and want to test the water, the budget kit is a sensible first step, and you can always upgrade later. Electric sharpeners suit people who find hand filing awkward, and the bench grinder is only worth the money if you sharpen often.
When to Replace Rather Than Sharpen
Sharpening cannot fix everything. Replace the chain if you see any of the following: cracked or bent cutters, loose rivets, links stretched so far that the chain will not tension properly, or cutters worn down to the wear mark stamped on the top plate. If you are not sure whether your chain is worn or your saw needs more than a sharpen, it is worth getting it looked at by a local dealer. If you are in the market for a new saw altogether, our guide to the best chainsaws for UK gardens is a good place to start.
Looking After Your Chain Between Sharpenings
- Keep the bar oil reservoir topped up and check that oil reaches the chain, because a dry chain dulls much faster. Our guide to the best chainsaw bar and chain oil covers the options.
- Avoid cutting at ground level. Soil, grit and stones are the biggest enemies of a sharp chain, so lift logs onto a sawhorse where you can.
- Clean the chain after use and store the saw somewhere dry, with the bar cover on.
- Rotate or flip the guide bar occasionally to wear it evenly, and clean out the bar groove.
- Keep a spare chain, so you can swap quickly and sharpen the dull one at your leisure.
Our Recommendation
Learning to sharpen your own chain is one of the most useful skills a saw owner can pick up. A decent hand kit costs less than a single replacement chain, and a few strokes each time you refuel keeps the saw cutting cleanly and safely. If you want the simplest route to good results, start with a guide-based kit such as the Stihl 2 in 1 Easy File or the Oregon field kit, remember to lower the depth gauges every few sharpenings, and replace the chain once the teeth are worn down to the marks. Do that and your saw will cut faster, safer and for longer.
More Garden Reviews
Looking for more? These related MyGreenShed guides are worth a read next: